
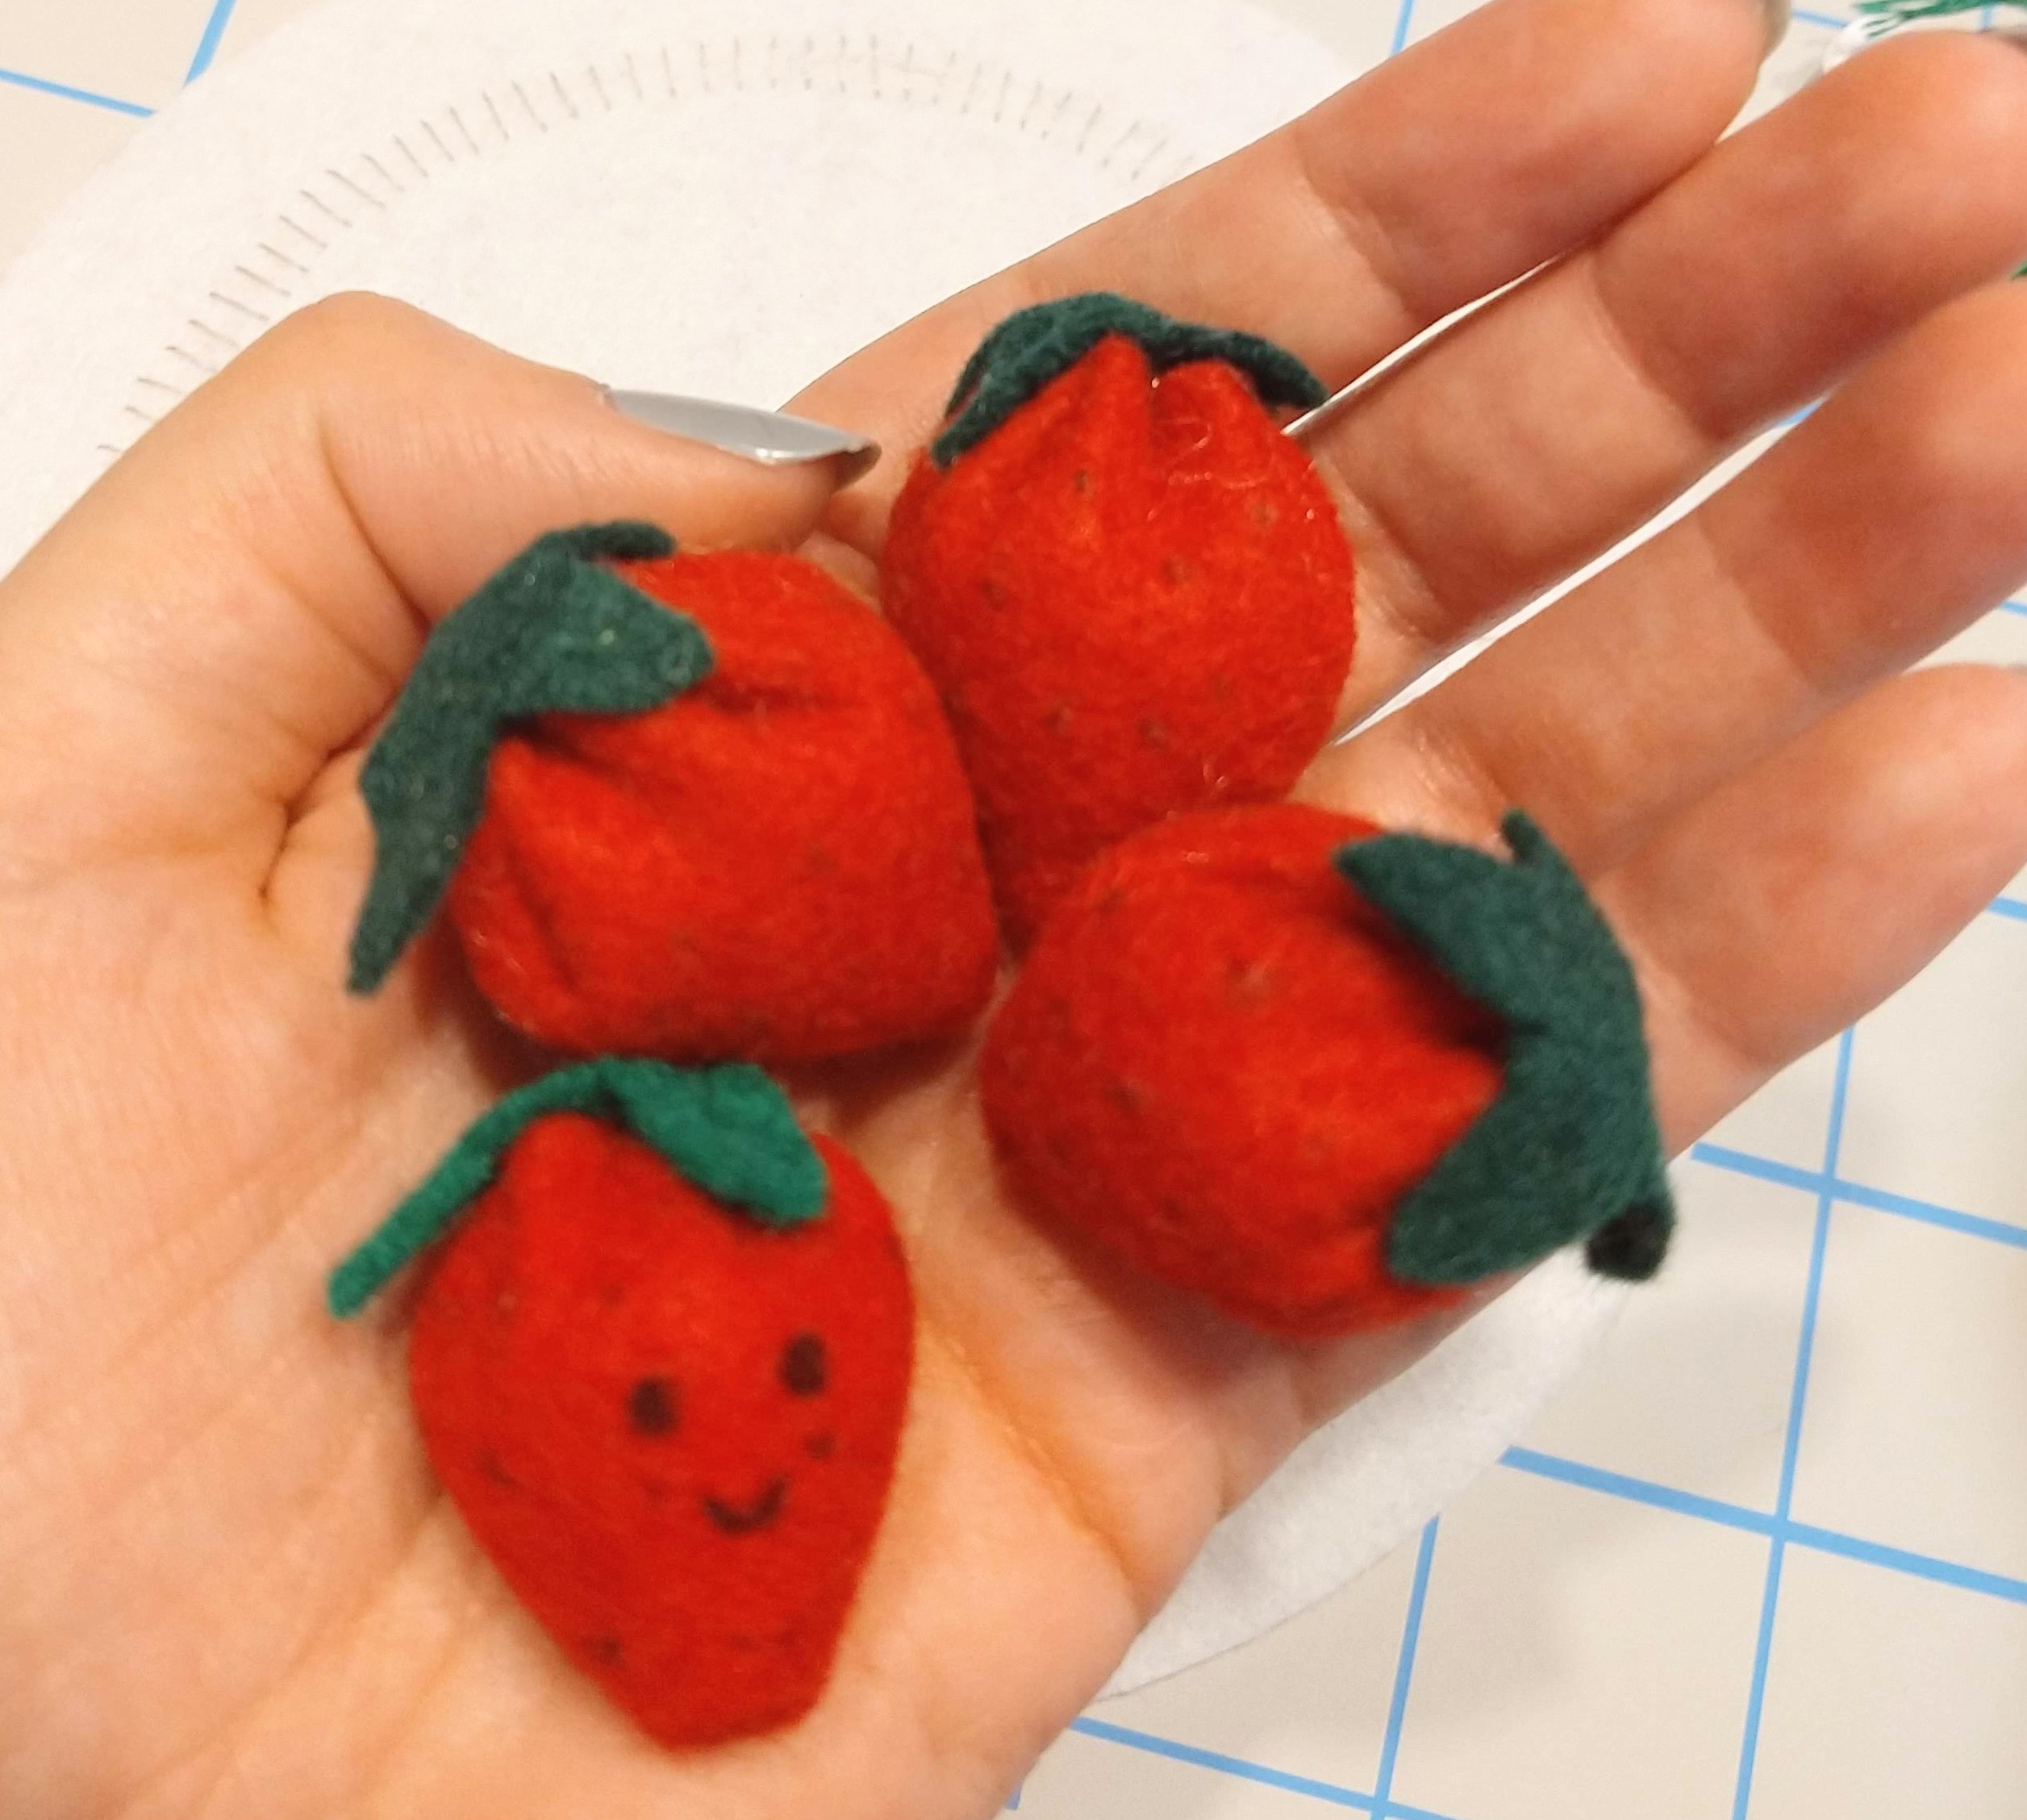
Felt strawberries are one of the easiest (and cheeriest) felt crafts to make. They’re a simple design, really, with satisfying results! They’re also one of the first felty foods I learned how to make.
Ingredients
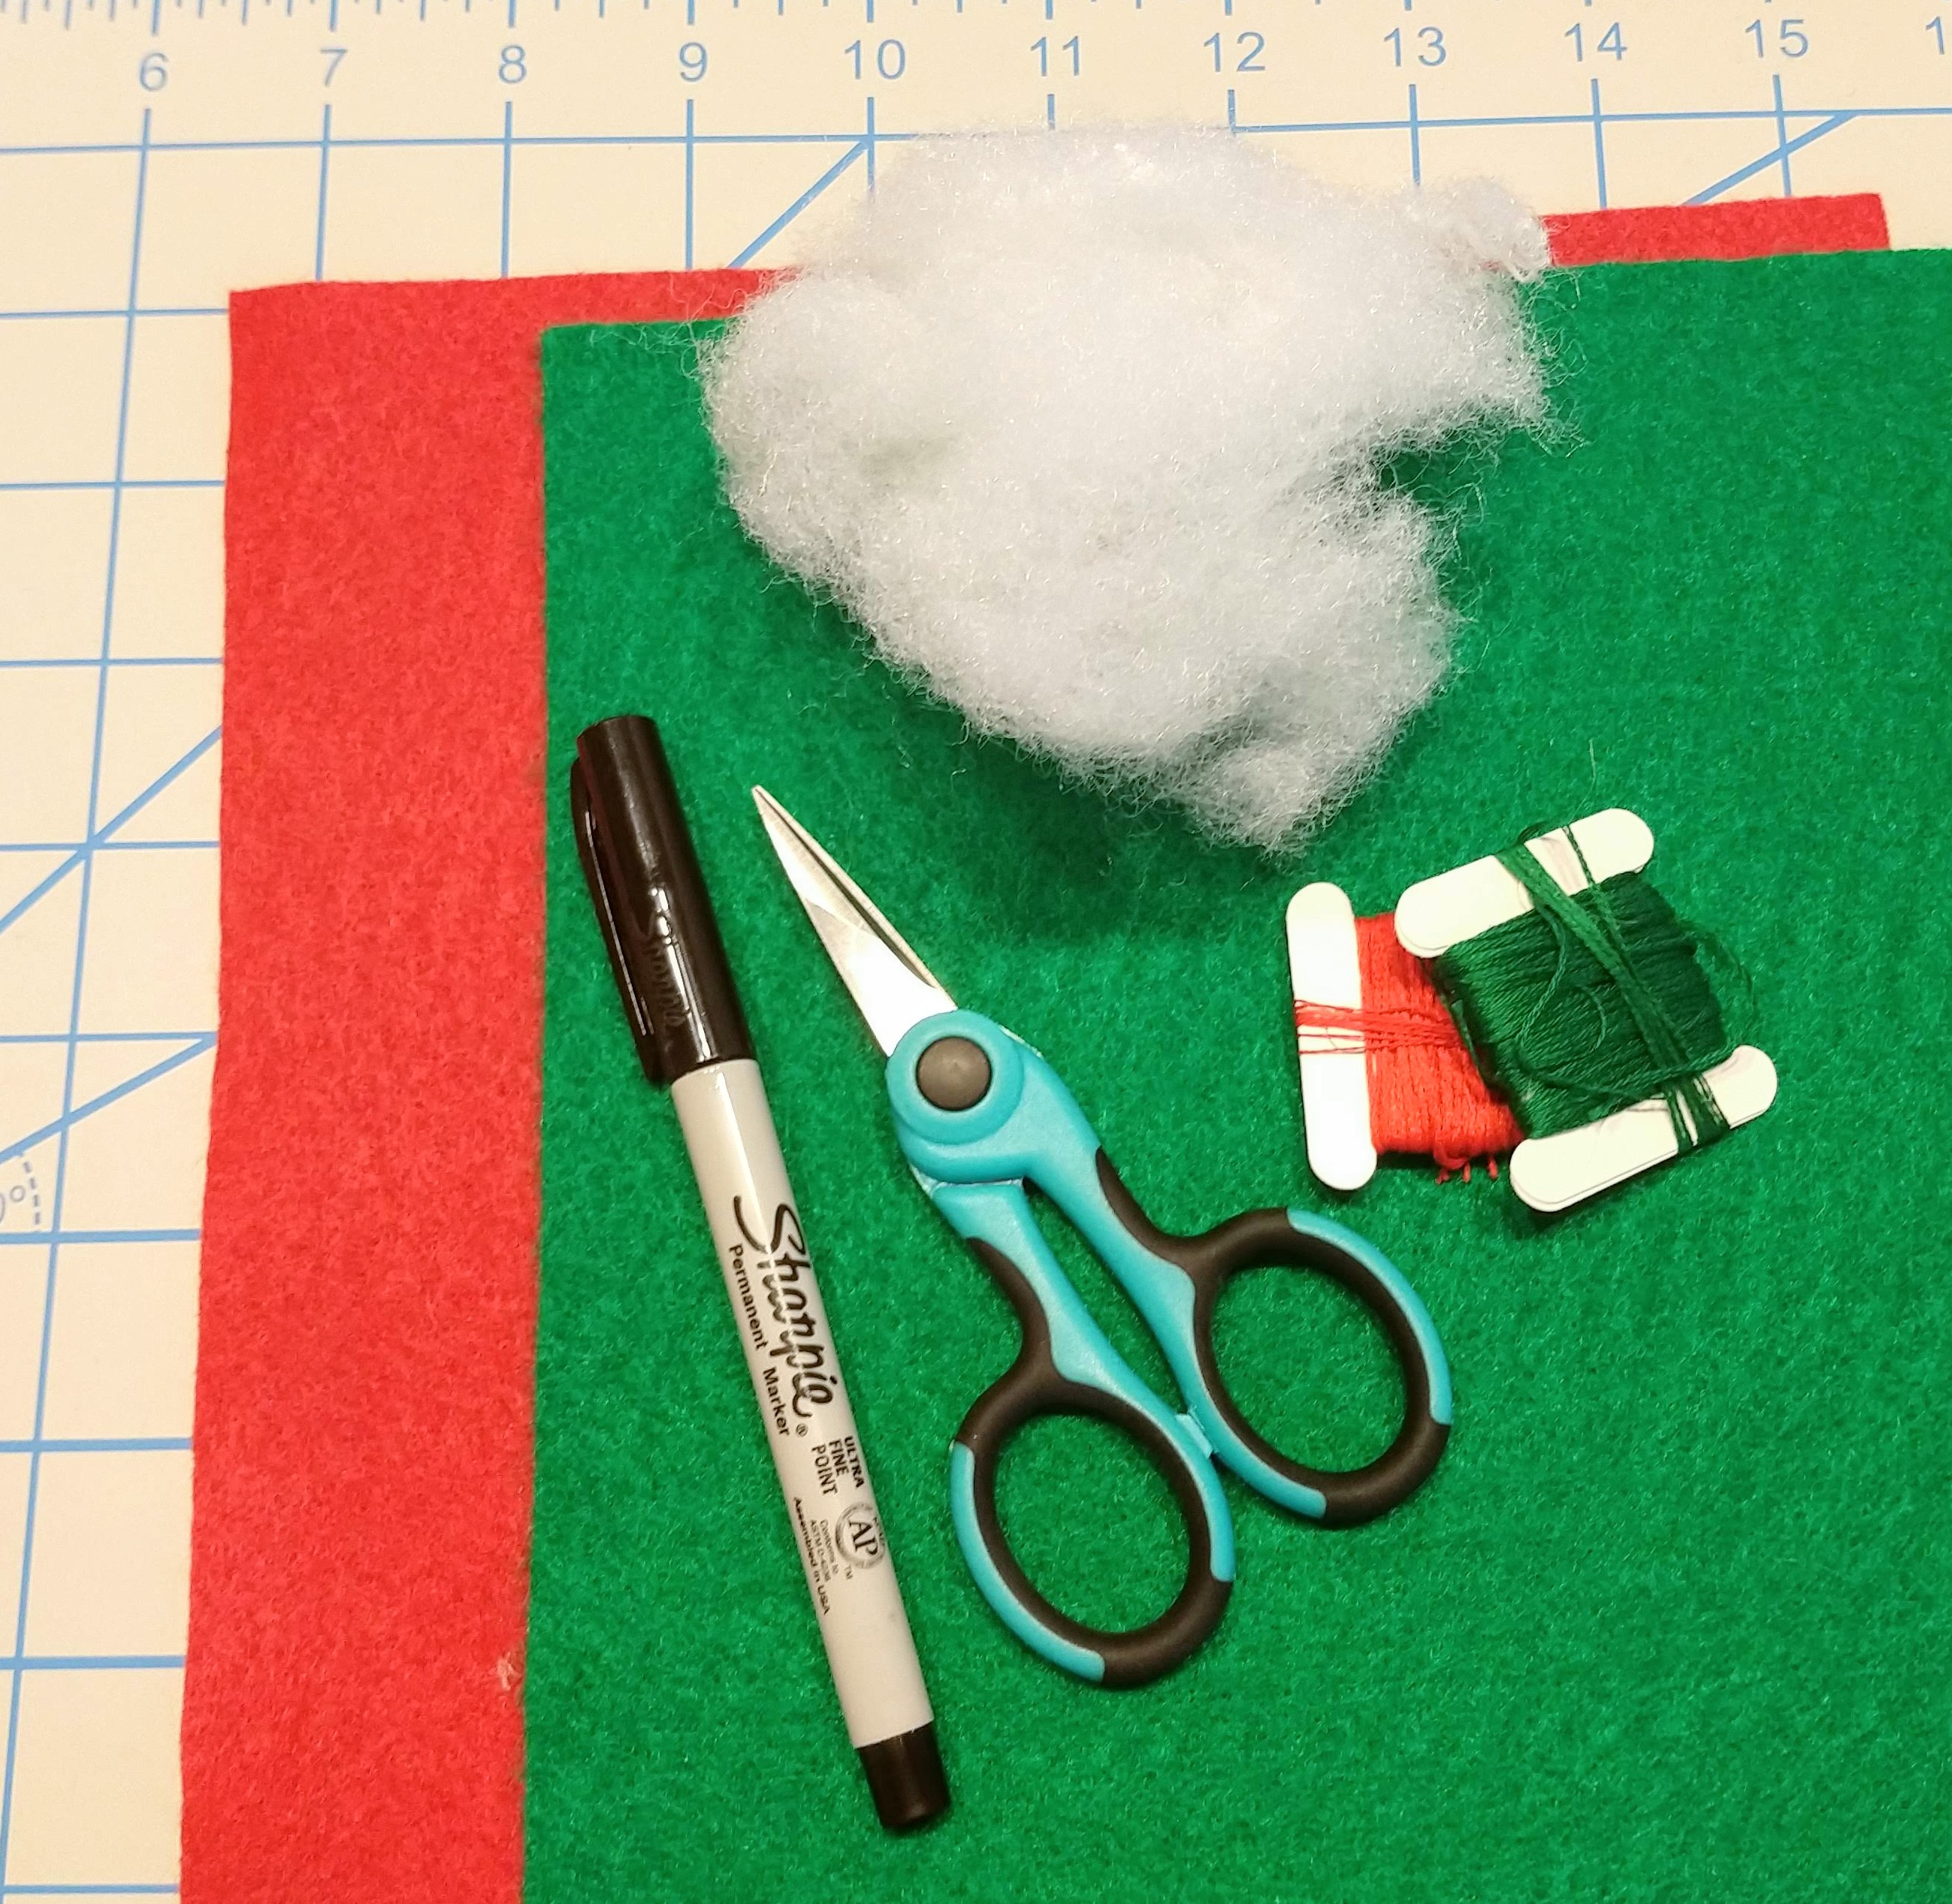
- Basics: scissors, needle
- Red & green craft felt
- Red & green thread or floss
- Polyfil stuffing (or dryer lint–no one will know!)
- Optional: Sharpies or other fine tip permanent ink marker; paper & pencil if you want to keep your circle pattern
First Step: Pick out a Circle
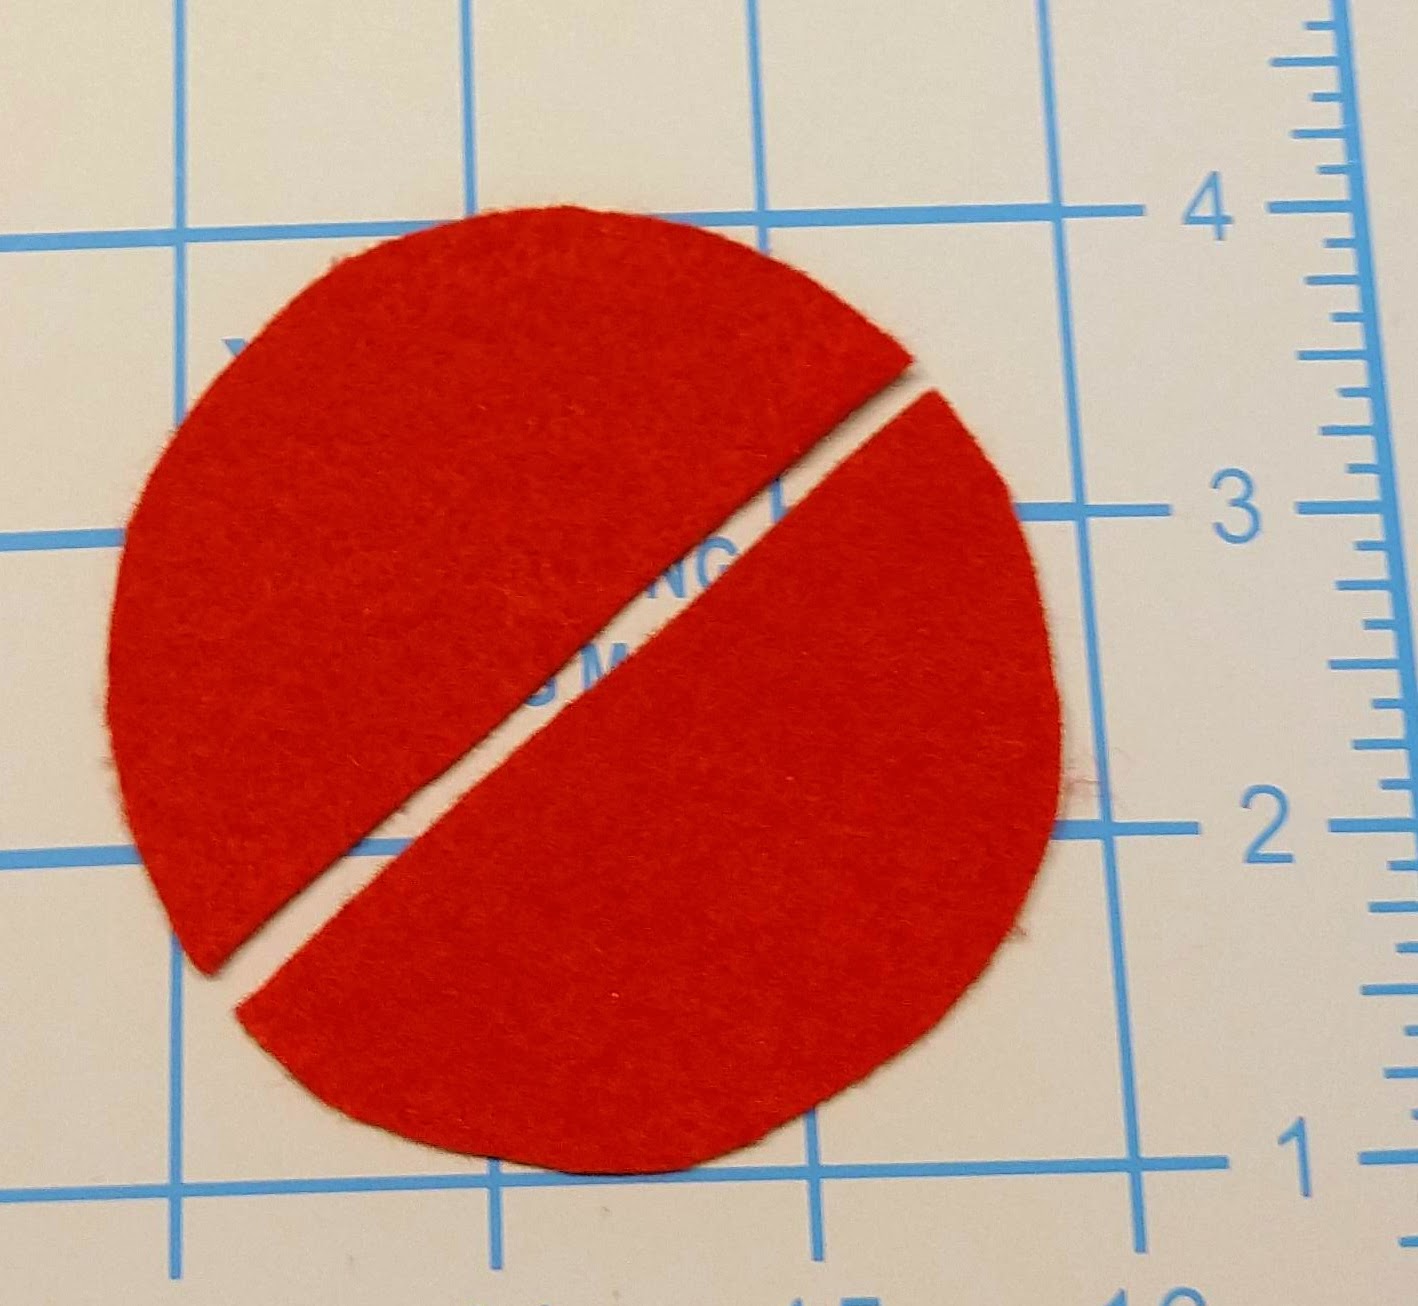
The pattern starts with drawing a simple half-circle. Yup. Any size you want. Even better: just trace and cut out a full circle and cut it in half. (More strawberries!) The radius of your circle will end up being the height of the strawberry. (As a reminder, radius is just half the diameter.) In simpler terms, if you were to cut out a giant slice of pie from your circle—that’s about the size of what your strawberry will be. I used a glass from the kitchen that made a 4-inch circle. Even though it seemed large, the resulting strawberries are pretty small–only a little over an inch! You may want to opt for a 6-inch or so circle for slightly larger strawberries.
Stitchy Time!
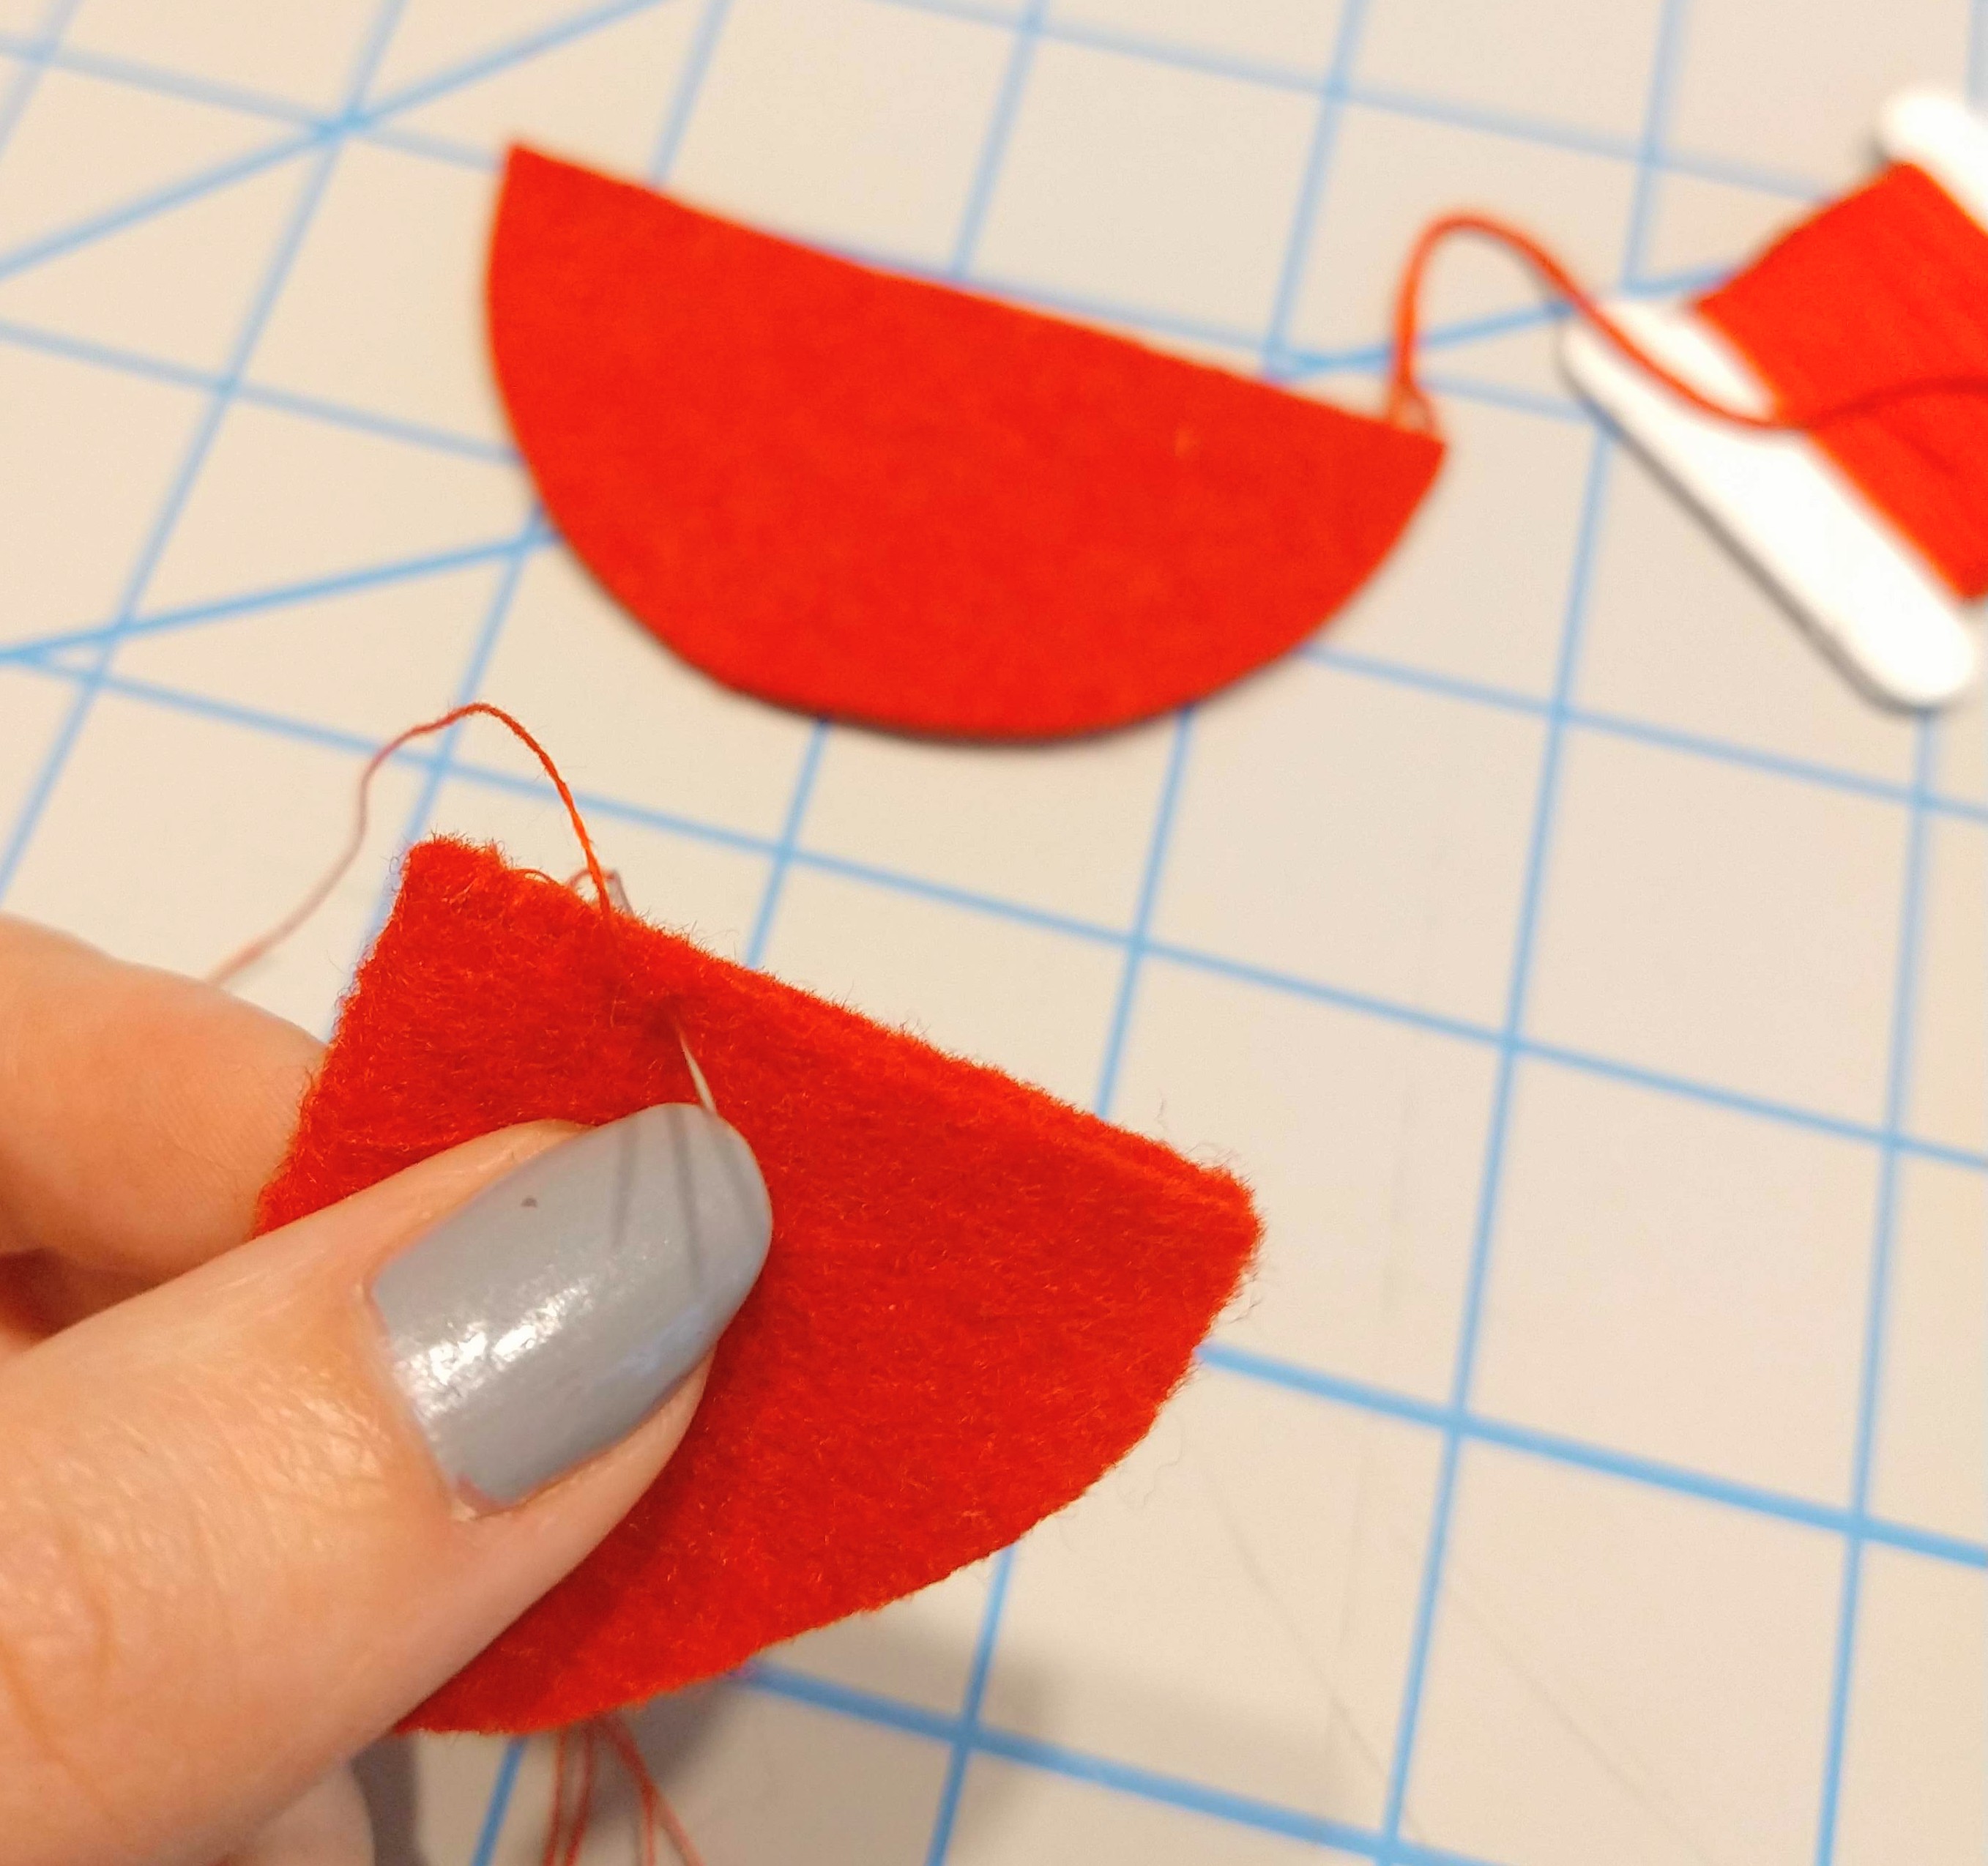
Next, you’re going to take your red thread (or floss) and sew right along that flat edge (aka radius-to-radius because geometry and felt go together). Leave your knot on the outside because we’re gonna turn this baby inside-out.
Stuff & Cinch–Almost There!
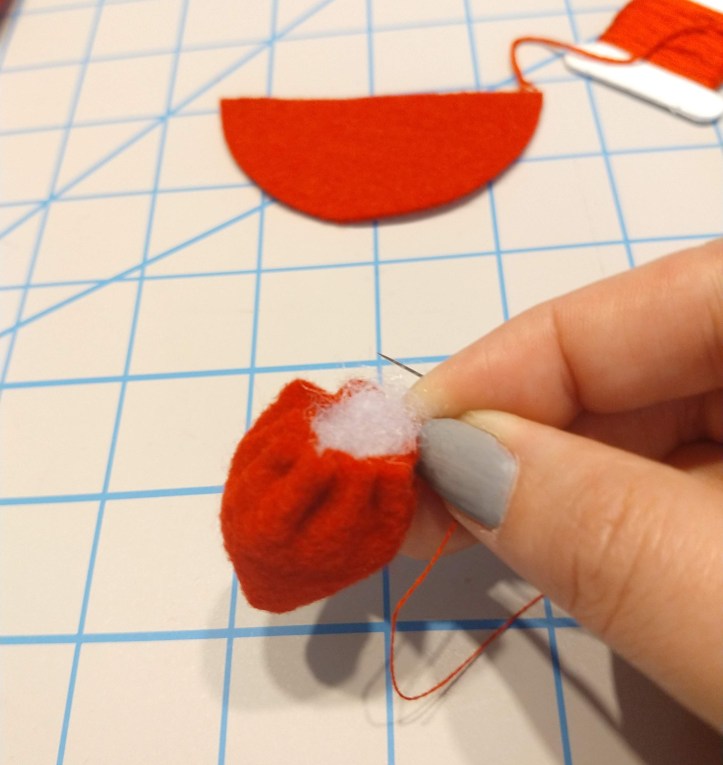
Turn your strawberry inside out and stuff it with your choice of filling. Start sewing around the top edge, cinching as you go, maybe crisscrossing over the top. Don’t worry about about if it looks messy, because we’re gonna cover that with a few leaves.
Leaf Time!
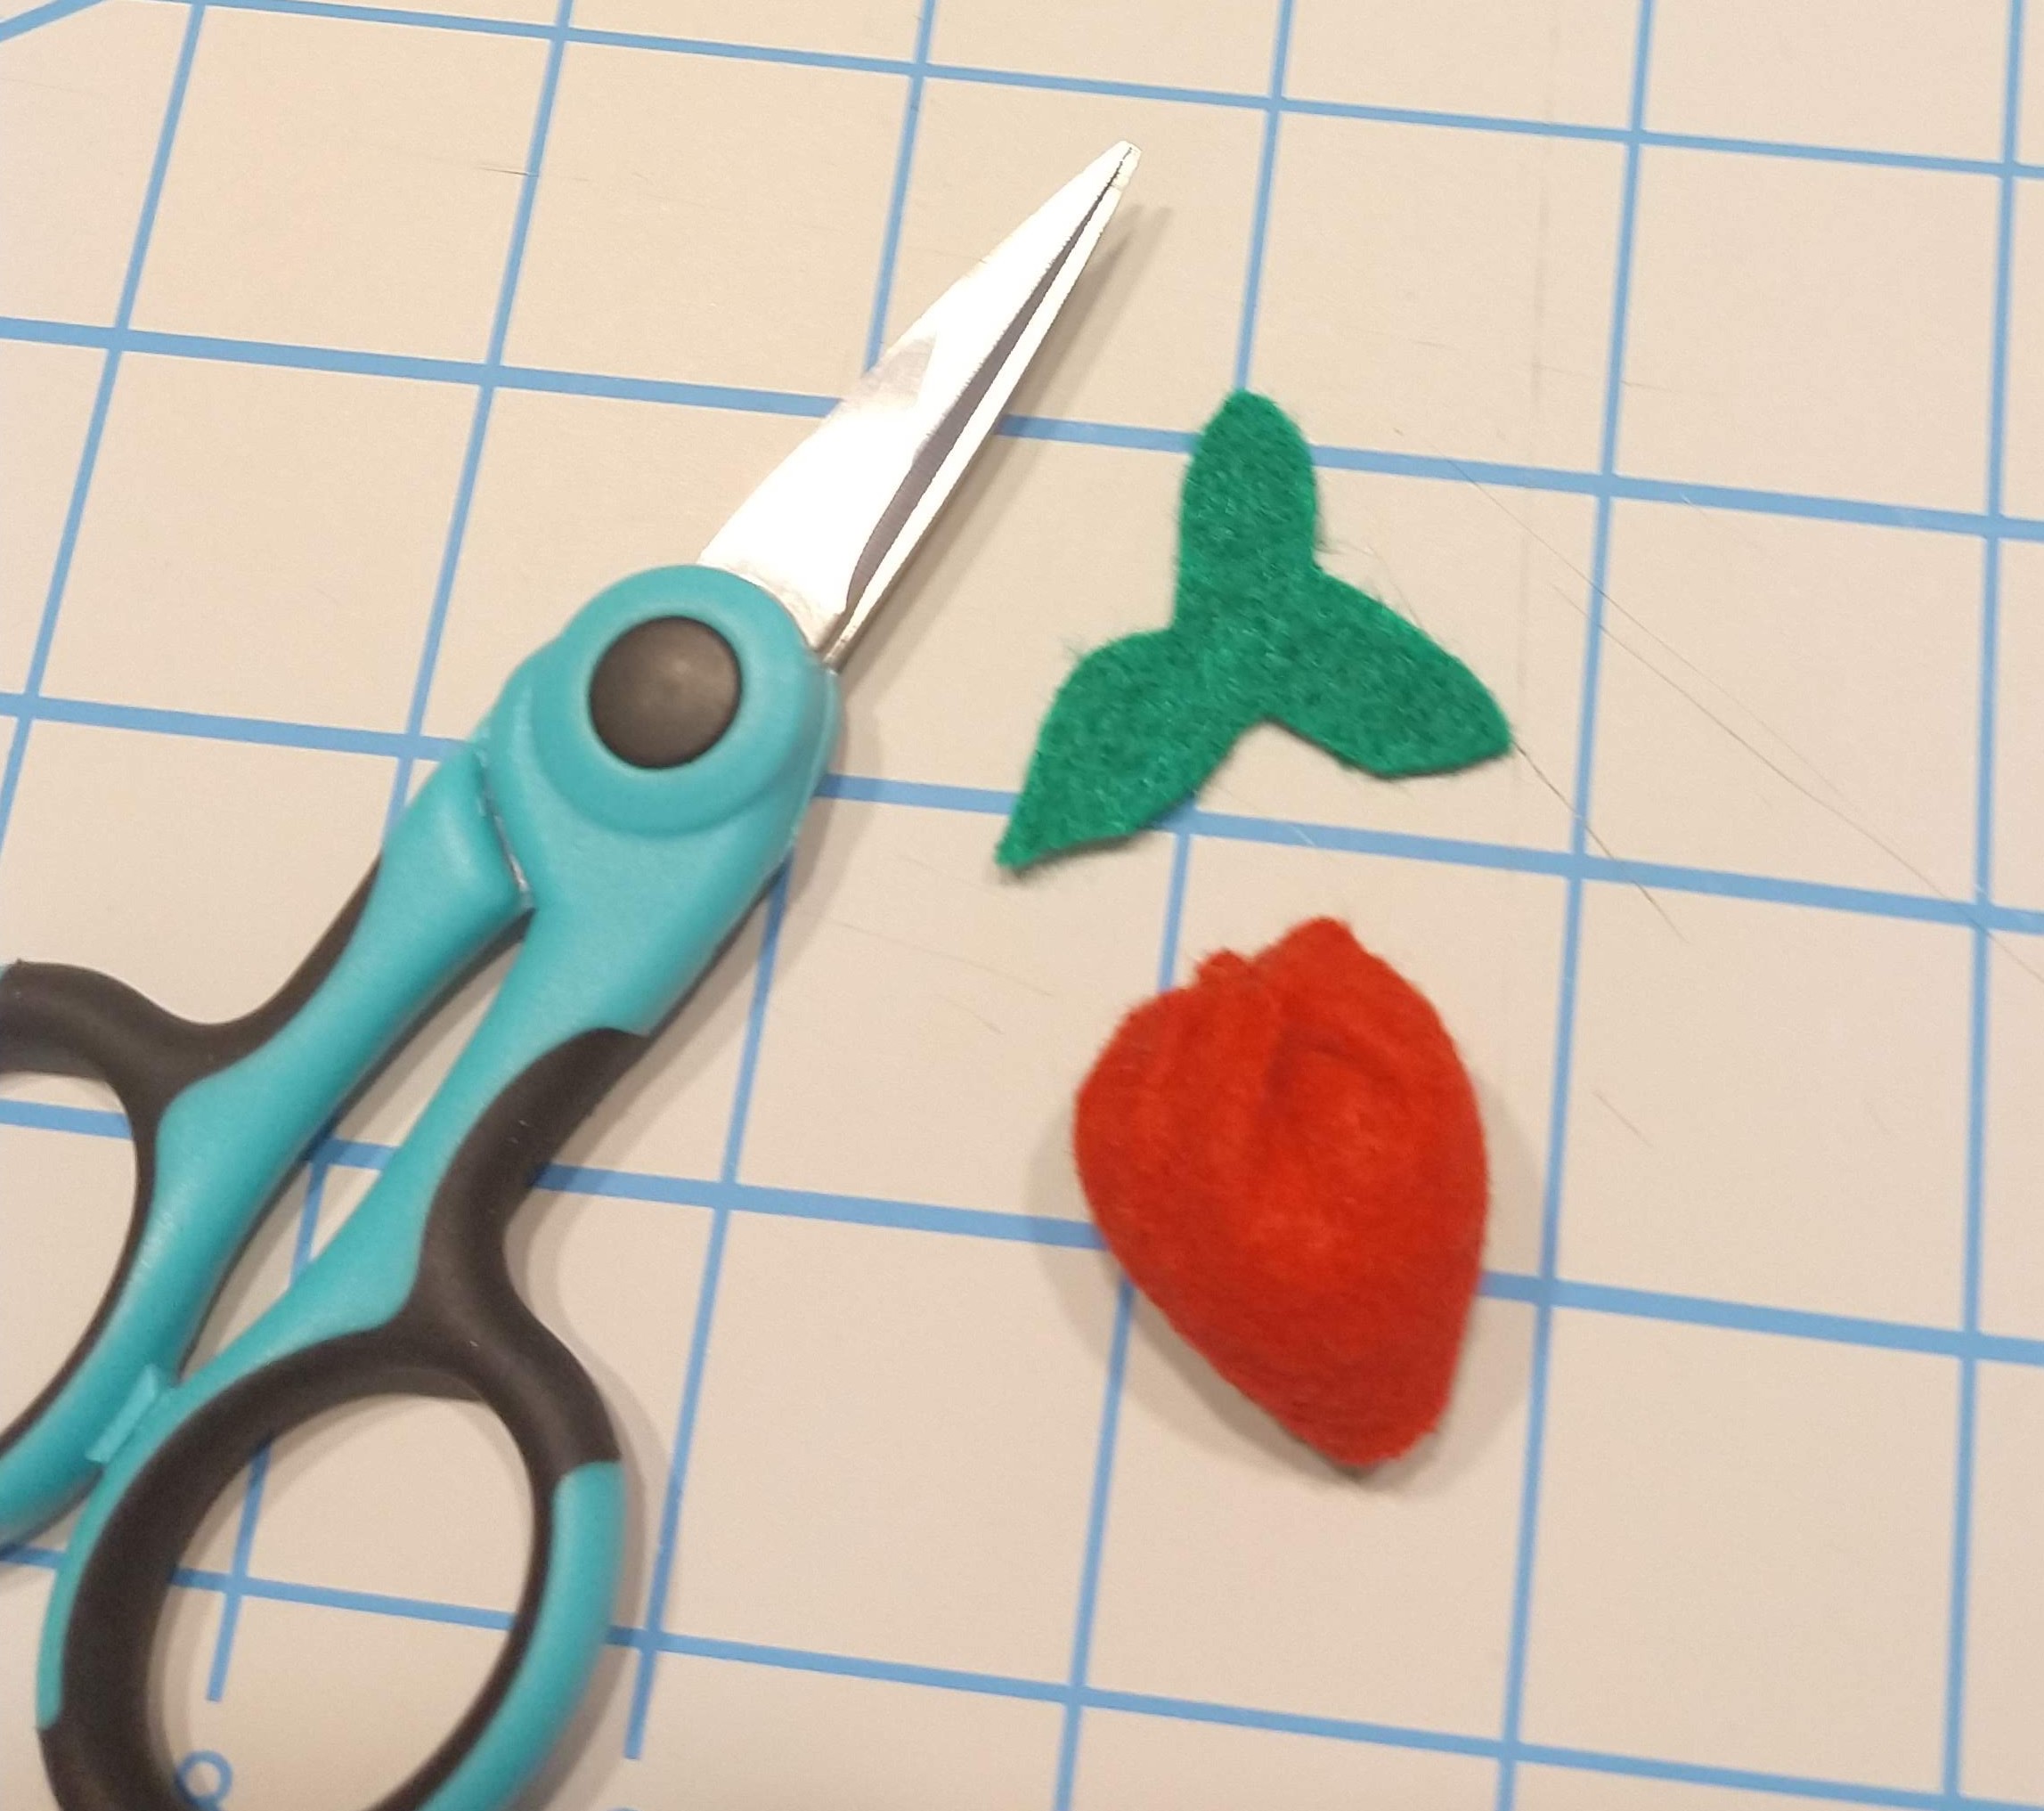
Cut out a couple of leaf shapes from your green felt. Or, if you’re like me, cut out 3 or 4 at once and leave them connected for less sewing later. Using your green thread (or floss), poke up through the middle (to hide your knot) and make a few stitches to attach to the top of the strawberry.
Decor Time!

Advanced folks could have embroidered a little face on their strawberry already and that would have been impressive. But if we’re being efficient about it, we can sharpie little dots for strawberry seeds and a wee smiley face.
Time to Enjoy!
You now have a wee strawberry! Maybe make another giant one. Or make a family of 12. Place them in a basket and impress guests! Maybe make a tiny shortcake and plop them on top! Either way, you have mastered the felt strawberry. Let me know how it went or tag WonkyFelt in your fancy Instagram post about it! 🙂

Love your strawberry tutorial! ❤
LikeLike