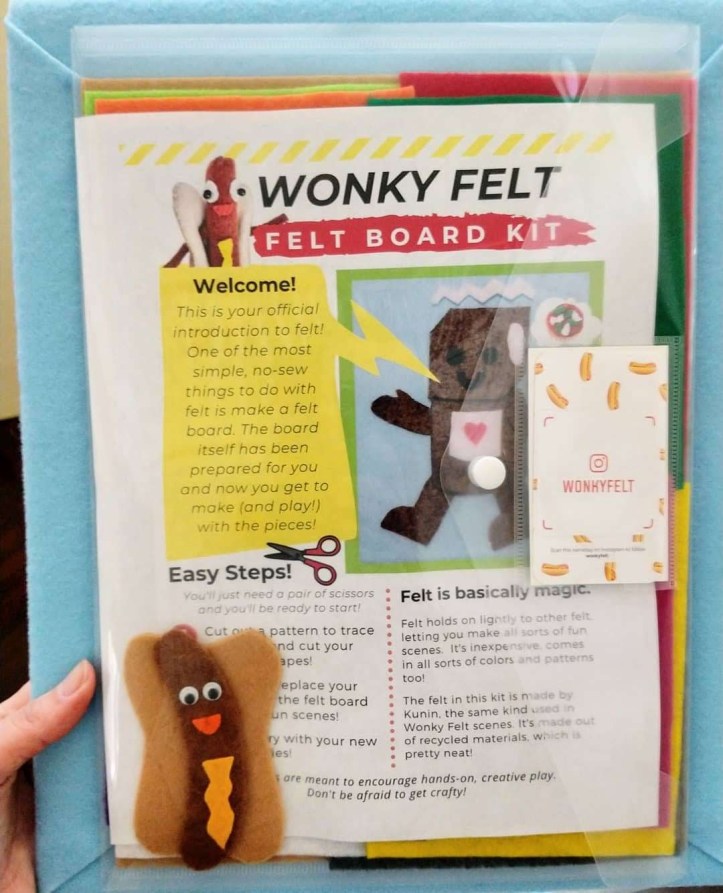

Wonky Felt was invited to do a felt program at our local library so I decided to make all-in-one felt board kits to encourage kids to get crafty and make their own stories. I also wanted it to be something they could take home for future felt fun!
I made a basic felt-board and then pre-loaded the kit portion with templates, felt squares, and a Mustard Dog felty. The kids loved them! I added a link at the bottom of this post so you can download the Wonky Felt themed templates too! (Woohoo!)
Here’s how I made the felt board kits:
Materials Needed
- Foam-Core Board
– 11″x14″ with 3/16th-inch thickness is perfect for a lap-sized, travel friendly felt board (I’ve linked a 4-pack, but there are some larger packs available too). You could also use cardboard, but I would glue two pieces together for extra sturdiness. Canvas boards are a nice alternative too if you’d like something larger (and probably longer-lasting).
- Craft felt – Go for the 72″ wide bolts of felt if you’re mass-producing these. I used Kunin’s baby blue felt. You can also use flannel. Test it at the store if need be and make sure a piece of felt will hang on to it.
- Felt Variety Pack
– These packs tend to run out of stock on Amazon, but watch for sales at your local craft store and load up on a supply. I cut the 9″x12″ sheets in halves or quarters and made sure to get extra of certain high demand colors (e.g. tan and red for making pizza).
- Clear Plastic Storage Envelopes
– I liked these because they had a little card holder where the kids could write their name and I could slip in a Wonky Felt card.
- Gorilla Glue Mounting Squares
– To attach the envelopes.
- Optional, but helpful: Aleene’s Tacky Spray Glue
– This goes a long way. I did 50 boards with one can. I’ve heard it can also refresh the tackiness of Cricut sheets but I haven’t tried it yet!
Tools Needed
- Hot Glue Gun – Any will do!
- Giant Fabric Scissors
– Really, these are the best
- Optional, but helpful: Yard Stick
– If you don’t already have a giant straight-edge
Felt Board Assembly
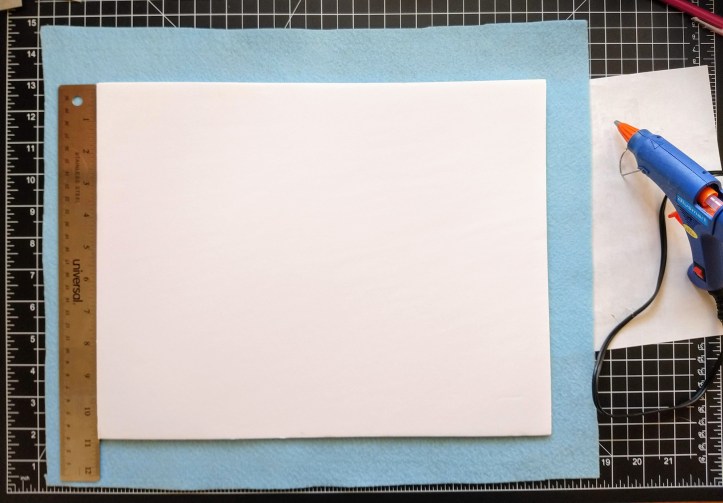
I purposely bought foam-core boards in the size I already wanted to avoid having to cut each one out. Plan on needing about an inch and half of felt around each side to wrap over the back of your felt board. So if you’re using an 11″x14″ board, cut out 14″x17″ of felt. If you’re mass producing the boards like I was, cut your first sheet nicely with the straight edge and then use that as your guide for all the next ones. They don’t have to be 100% perfect, after all, you’re going to wrap it around the back of the board and cover it with an envelope.
I very lightly sprayed Aleene’s Tacky Spray Glue on the felt and placed the board on top–just to help hold it nice and snug before I did the next steps. Pro Tip: Use the spray glue sparingly and don’t spray it directly on the board itself. The board responds strangely to be sprayed directly with the tacky glue. It’s also best to spray it outside–it’s stinky stuff.
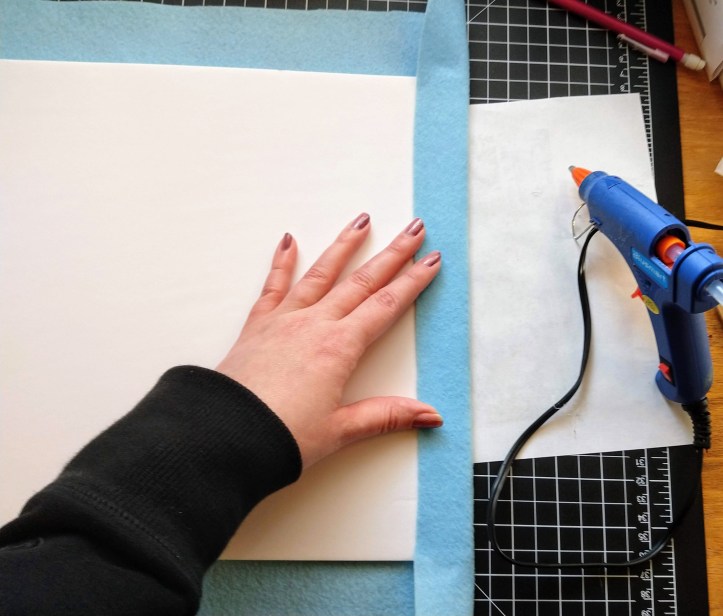
Next, fold and hot glue the two short edges of the felt to the board. Make sure they’re nice and snug. We’ll get to the longer edges in a bit.
Then trim the corners at an angle and trim off the resulting triangle as seen here.
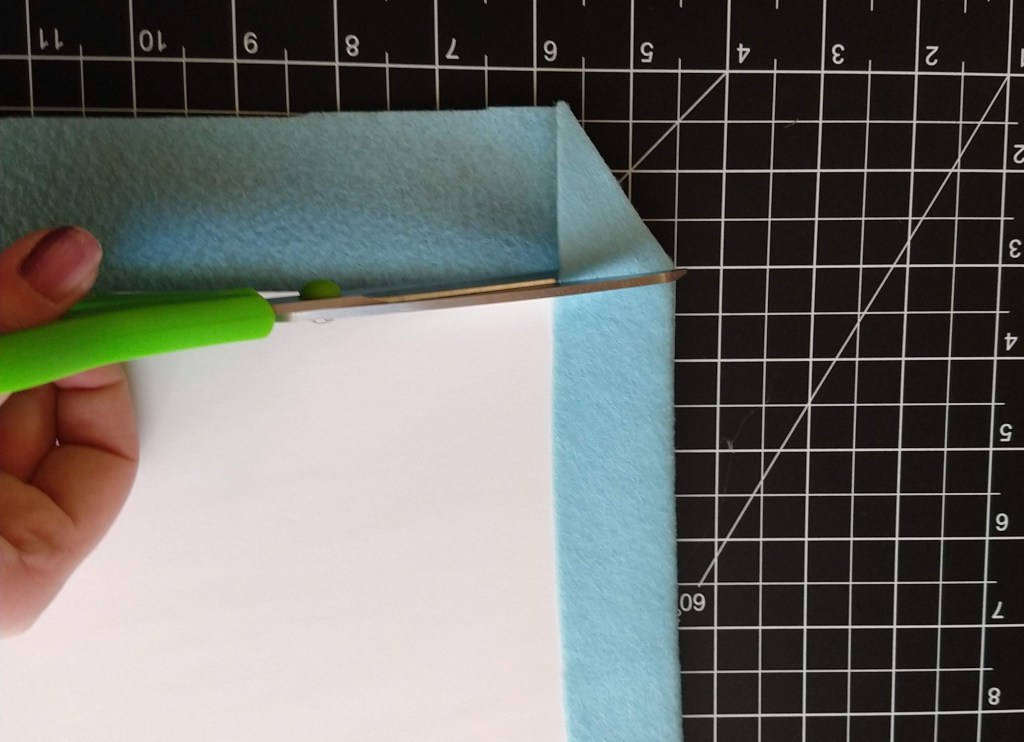
You should end up with a nice flap that looks like you’re wrapping a present. Glue down the long sides. All of those many years of gift-wrap experience are coming in handy right now.
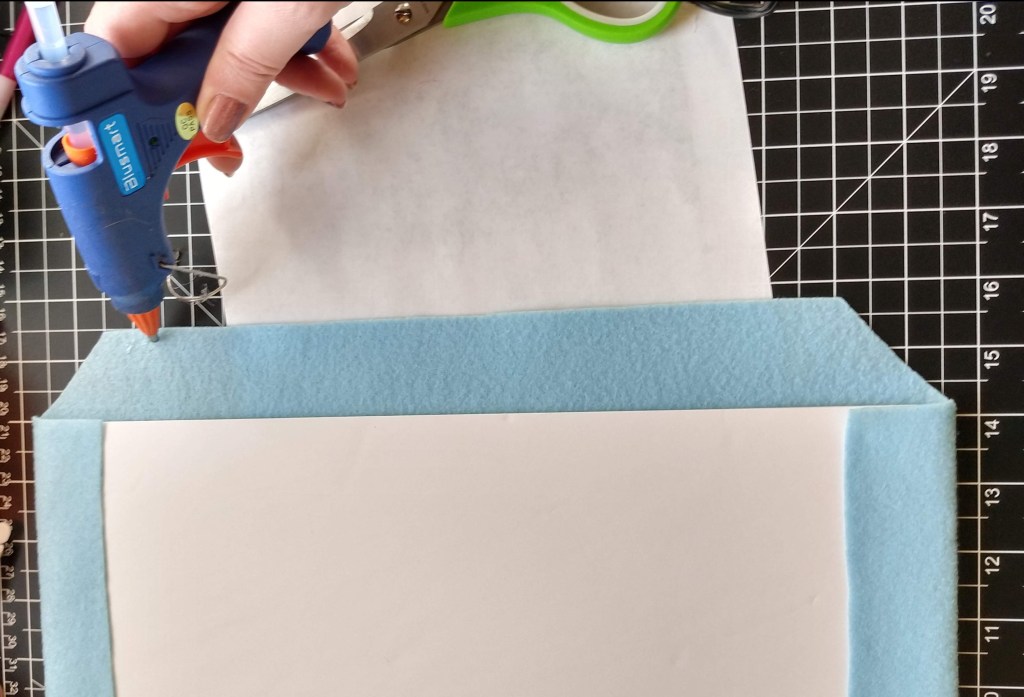
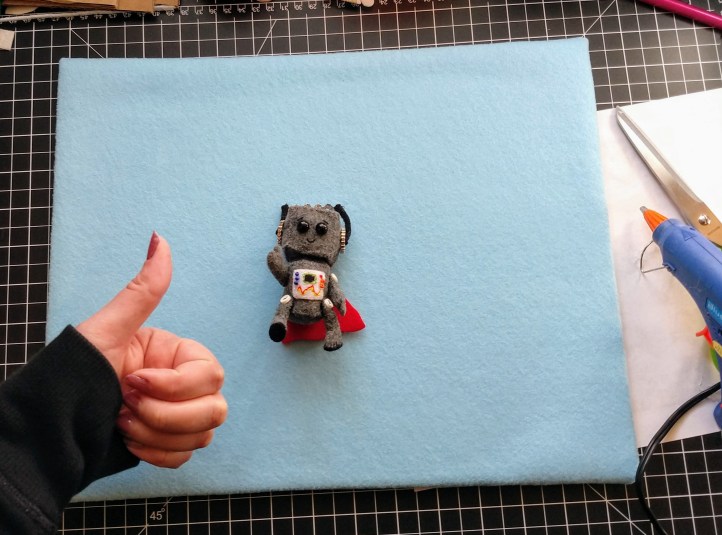
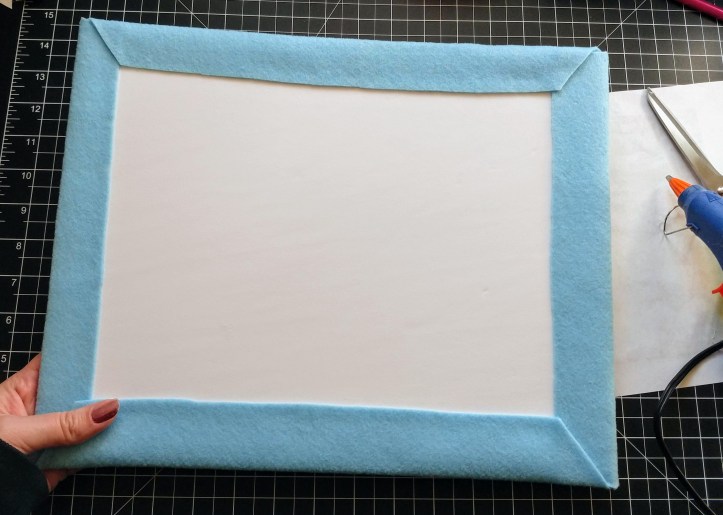
If it’s looking like a present, you’re on the right track! We’ve got a felt board!
From here, I stuck glue squares in each of the 4 corners, right up to the edge of the felt and stuck the plastic envelopes on. Pro-Tip: The plastic envelopes will need some help to stay stuck to the glue squares. You’ll need to reach inside the plastic envelope and score them against the glue squares a bit. (I used a screw driver and scored hashtag marks on each to help them hang on tightly to the board.)